Saturday, 27 February 2016

Bloom in Love!

Hello everyone!!

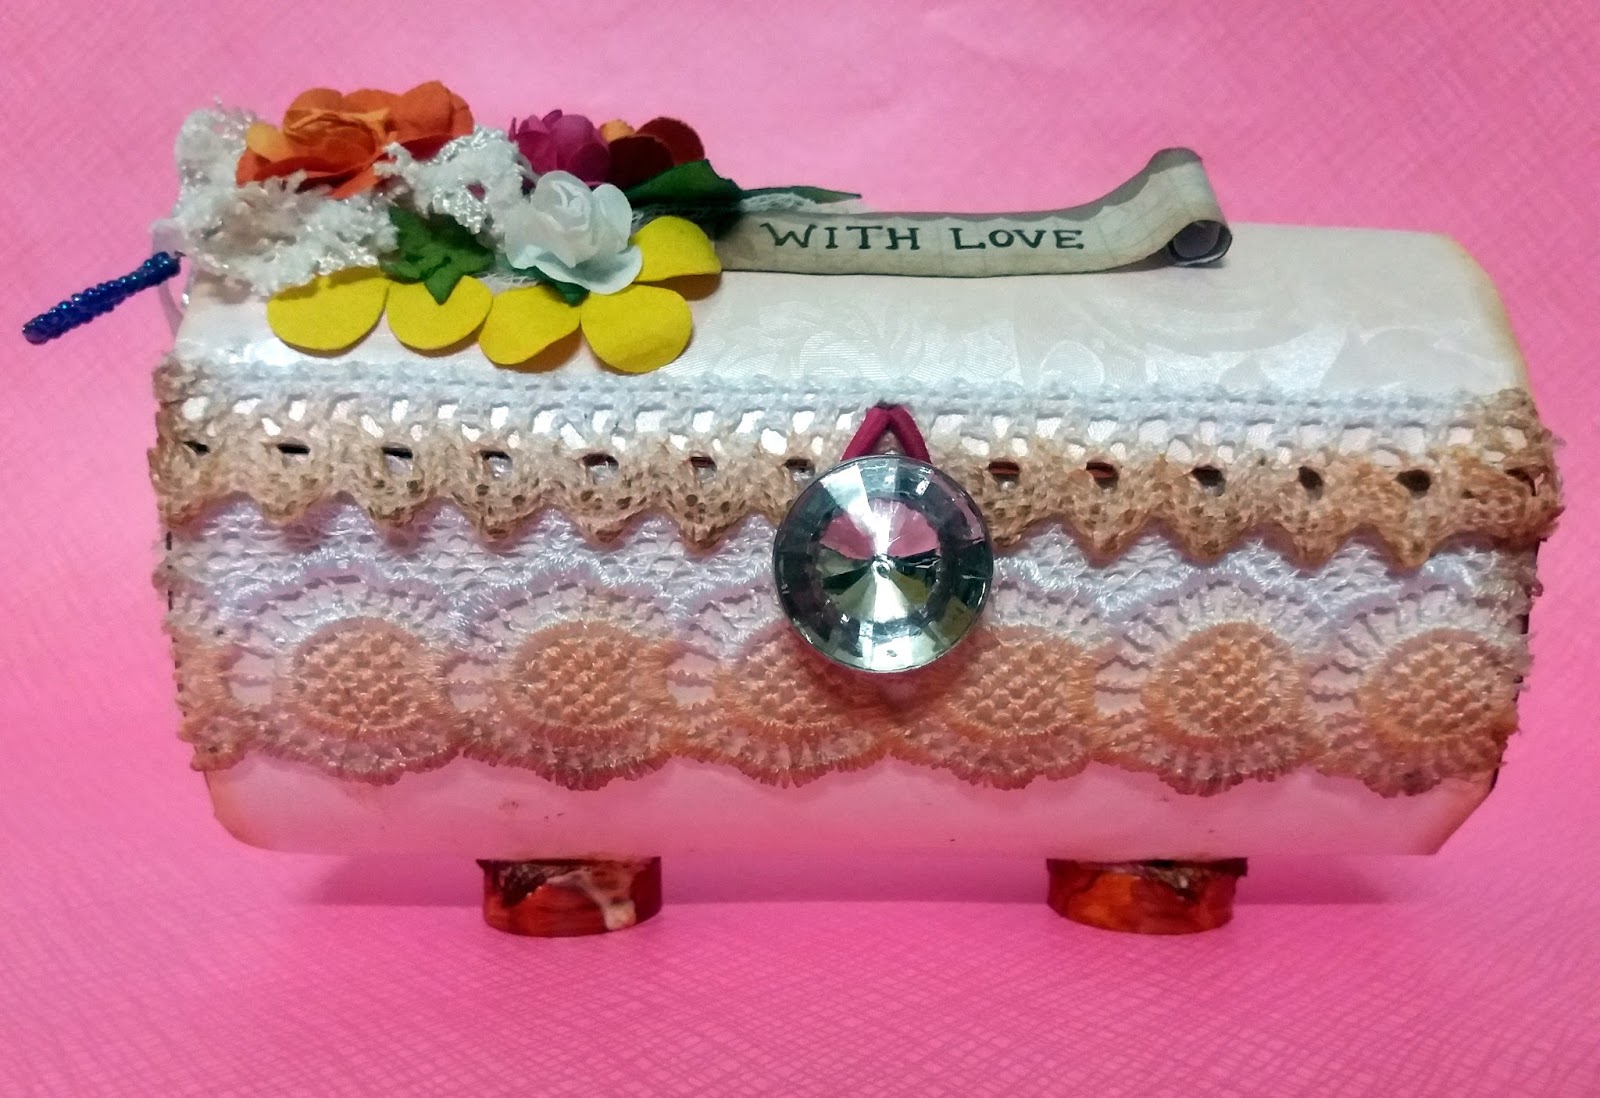
February,the month of valentine is coming to an end and I thought of sharing my last valentine project for this month with hearts and sparkles! Have a look at my mixed media love canvas


Base is prepared using scraps of patterned papers, laces & a piece of vegetable netting (on top). I applied a thin coat of gesso and once dry sponged acrylic colours all over. Then sprayed some mists while the paint was still wet to blend everything well. Then did some splattering with paints & it was done.


My handmade pink rose, Isn't it looking pretty? I love it! I used inks, shimmer acrylics & spray to get the shine & colour. My another flower in blue-green-pink shade was an experiment with colours! 


Two pretty hearts, one in glitter foam sheet & the other is a wooden flourish with rhinestones. 


Added a small frame made up of clay. I did some random stamping using Bo Bunny It is Written Stamp Set. 
Finished my canvas with rhinestones, sequins, & golden hearts cut from foam sheet.  

I hope you like it! Please share your views, they mean a lot to me :) 
Thanks for stopping by! Have a great weekend!

Linking to
Lulupu Challenge (Hearts and Arrows)

Peek-a-boo designs  
I used 1st column: Flowers + Twine + Pink and Bo Bunny It is Written Stamp.
More than words challenge (WONDERFUL & SPARKLE)


Friday, 19 February 2016

Mandala Magic!

Hello Everyone!

I have a unique card to share today, with a mandala design as it's focal point. A mandala is a circular figure which starts from a center point and moves outward. These are symbolic in many cultures and often symbolizes wholeness & unity. 
Inspired by this month's ICR coasteride challenge, where the theme is to use a mandala design with few other elements, I came up with this card. 


This mandala design is from a wedding invite, I added some pearls & rhinestones to it. Added ribbons & lace to my card with my handmade water-coloured flowers and a ribbon-bow.
At the opposite corners I did some stamping & adhered fussy cut flowers & leaves on it. At the other corner there is a pretty silver die-cut stuck between the two base card-stocks. 

I hope you like it! Do tell me, your valuable comments means a lot to me :)
Thanks for stopping by!
Have a great day!

Linking my card to
ICR Coaster-Rides Challenge (Tic-Tac-Toe + Mandala)
TAG Name-ICRCWIN01
I used Sparkle/Bling + watercolour (flowers are water-coloured) + Diecut 


I used Flowers + Ribbon + Red 
& Flowers + Bling & pearls + Diecut
& Diecut + Gold (on mandala design) + Red 


Quirky Crafts (Red/Pink + Black & white)
I used Red + black stamp on white base.

Craft-Dee BowZ (Anything Goes and include a HANDMADE BOW)

Monday, 15 February 2016

Grungy Altered Box

Hello Everyone!
I am back with a mixed media vintage project! I want to give it some grungy masculine look hence avoided all pinky colours & no flowers!
Enjoy the pics..


I covered the lid (was detachable) with embossed handmade paper and adhered some cheesecloth to it. Then added tiny cubes of foam at the corners. Next gave it strokes of acrylic colours brown, antique copper & gold with hint of pearl green here & there.

Sentiment is a rub-on sticker, which made me remember my childhood days when we used to apply these rub-ons to our hands. I rubbed it over a handmade paper, then inked it with gathered twigs DI & distressed the edges.

Added some tiny embellishments, a button & ship steering wheel painted in gold & pearl blue shades, with mini hearts & a compass stamp. Shiny black arrow is made using a toothpick & cardstock. I love it!
For the bottom part added some scraps of papers, painted them & rubbed some DI.

Now let's move inside, there is a surprise!


You can see now lid is attached to the bottom part, I have joined them using handmade paper (thick enough to hold well). There is a quote & a mini notebook.


Handwritten using DI and paint brush.


Base of the box is covered with papers from an old novel sponged with DI and stamped with tiny stars. Added tiny tags 'secrets', 'memories' & 'fun' (on the other side).


My notebook is hand sewn. Cover is again made with embossed handmade paper. Here it opens!


I hope you like my project! Do tell me, I love to read what you say & Thank you for stopping by!
Have a wonderful day!

Linking my box to
Anything But Cute Challenge (Grungy Love)


Monday, 8 February 2016

Valentine Zig-Zag Card

Hello Friends!

I am sharing a zig-zag love card today, with some masculine touch with no pinks! But I used some red to compliment the love theme, have a look


Front is embellished with my handmade roses, small hand cut paper dollies, an arrow & a small bow with gold glittery center. Sentiment was stamped, heat embossed with pink embossing powder then fussy cut & adhered to a small tag. 


I used this pretty blue patterned paper everywhere which was perfect for the valentine theme. Quotes were handwritten, "Moments" & "Forever" was written using stencils.


Added tiny rhinestones here and there to add little shine to my card.
I hope you like it! Do share, I love to read your comments :)

Thanks for stopping by!
Have a Wonderful day!

Linking my card to


Saturday, 6 February 2016

Scrappy Card!

Hello everyone!
Here is my first post for February month, a card made from scraps! Have a look


For the center I used some scraps & a piece of corrugated paper from a carton. Keeping in mind the valentine theme I stuck two mini hearts at the corner, these were fussy cut from a wedding invite.
To make this card I collected all my scraps


Patterned papers have wonderful prints on them & i feel like to store every inch of it!
Starting with a white cardstock, did some stitching at the border & then picked up some watercolors in pink & red & allowed them to flow on my card. Then layered some of my scraps at the center, made some polka dots on black one using signo white gel pen.


 Next distressed the edges & added all the embellishments. Matted it on a black cardstock which was again matted over a pattern paper. Base is also from a wedding invite.

I hope you like my card! Do tell me :)
Thanks for visiting!
Have a great day!!

Linking to
Paru's Card Making challenge (Scraps+Valentine theme)


Mod Squad Challenge (Hearts & Flowers)

This card was selected as Top 3 at Mod Squad Challenge


Sunday, 31 January 2016

Treasured Memories

Hello Friends!
Today I have a layout to share with you all! It's my first one, and so I was very excited about what to add & how to proceed. Incorporating lots of patterned paper scraps, stamps, acrylics, inks & few other elements, here is my layout


Design is inspired by ICR Story scrappers this month's challenge. Starting with a pink patterned sheet stamped musical notes using Bo Bunny "It's written" stamp set, some circles using white and gold acrylics & pen cap. Once the base was ready punched the sides & using a craft scissor gave a wavy pattern to the sides. Then arranged the patterned papers. To match with 2-0-1-6 challenge at Lulupu I added 6 patterned papers one in floral print at the either sides, two around the black photo sheet & other two at the top (& the one in pink is the same as used around the photo sheet) and the base pink patterned sheet.


These pretty roses were fussy cut & slightly curved to give them a real look.

I loved these pretty pink hearts made with glittery foam sheet. Added some purple rhinestones here & there.
Sentiment is hand written!
I hope you like my layout. Do tell me, I love to read your comments :)
Thanks for visiting! Have a Great day!

Linking to

Lulupu challenge Recipe 2-0-1-6
2- flowers
0- washi tapes
1- stamp set (Bo Bunny music notes)
6- patterned papers


Thursday, 28 January 2016

Pretty Vintage Box Tutorial

Hello Friends!

A new post to share today, a vintage look box. I have re-cycled "something" to make this, to know what is that "something" wait and see :) 

I rubbed some DI to the laces and at the edges of the box to give it a nice look. My box has feet also made of bottle caps!


Top embellished with handmade flowers, leaves, laces and pearls. I adhered some cheese cloth & scraps of laces to prepare the base for my flowers and to add texture.


 Here is how it opens


It can be used to keep bangles, goggles or any other goodies :)
So what is that something?? Any guess?? 
Well its a plastic bottle!!

Here is the tutorial how it turned out,
I took a cold drink bottle for this and removed the top and bottom part to get a hollow cylindrical portion.

Using the bottom part drew two circle onto the cardboard & cut them.


Cut the bottle horizontally and stuck them together using a brown tape. This is done to create a flexible opening. Now close and check, the top lid portion should be just enough to cover the bottom part, if its bigger cut the lid portion horizontally again.


Now cover the inner portion using a patterned paper using brown tape. Don't glue it tightly as the box need some flexibility to open and close. Paper should be little bigger than the size of the bottle, around 1 inches extra on both the sides.


Cut the paper at the sides as shown below.


Glue the paper sides to the circles.


Similarly cover the exterior portion of the bottle with another patterned paper. Cover the circles at the sides also. . Make a small hole to the top part, insert the ends of the elastic through it and tie it. Use needle and thread to attach a button to the bottom part. And the box is ready to embellish!

I hope you like it! Do tell me! :)

Thanks for visiting! Have a great day!

Linking to


You may also like.